
DigitalOcean VPS clients need not look elsewhere when it comes to value offered for the price paid. When compared with industry competitors, DigitalOcean VPS stands our as a host with unparalleled performance, reliability, as well as flexibility.
Why Choose DigitalOcean VPS?
1. Speed
Speed and uptime are critical factors in website success. DigitalOcean VPS boasts state-of-the-art infrastructure and globally distributed data centers while other don’t, giving your website exposure to fast and efficient loading no matter where visitors are located. Do away with slow loading times and frustrated users, with Digital Ocean VPS, speed is on your side.
2. Complete Control
DigitalOcean VPS Options & Flexibility control puts you in control of your server fully. The customers are free to choose an Operating system, and configures the server to the preferred specifications. Would you like to scale resources to meet demand during peak traffic hours? Wish to install a specific software package? There is nothing in customer’s way with Digital Ocean VPS.
3. Advanced Security Features
One does not need any verification with DigitalOcean VPS, as this host keeps security as their utmost priority, offering built-in DDoS protection together, robust firewalls, and updates maintaining security for the clients’ websites.
How to Set Up a DigitalOcean VPS
Setting up a VPS on DigitalOcean is straightforward and efficient. Follow these steps to get started:
- Create an Account – Sign up on DigitalOcean’s website and verify your email.
- Create a Droplet – Choose your preferred operating system and server specifications.
- Access Your Server – Use SSH to connect to your VPS securely.
- Configure Security Settings – Set up firewalls, SSH keys, and security patches.
- Install Required Software – Install a web server, database, and any additional tools you need.
- Deploy Your Website or Application – Upload your files and configure your domain.
Who Can Benefit from DigitalOcean VPS?
Whether you’re a budding entrepreneur launching your first website or a seasoned developer in need of a reliable hosting solution, DigitalOcean VPS has everything you need to succeed. Don’t settle for mediocre hosting when you can have top-tier performance and reliability.
Make the Switch Today
In summary, DigitalOcean VPS offers the speed, control, and security necessary to take your website to the next level. Say farewell to slow load times and unreliable hosting providers—choose DigitalOcean VPS and experience the difference for yourself.
Your website deserves the best. Make the switch today and watch your online presence thrive!
Here’s a detailed article on setting up a VPS on DigitalOcean. Since I can’t include actual images here, I’ll describe what each image should contain so you can take screenshots while following the steps.
Setting up a Virtual Private Server (VPS) on DigitalOcean is a straightforward process. Whether you’re launching a website, a web application, or a personal server, DigitalOcean provides a user-friendly interface to deploy your VPS quickly. This guide will walk you through creating and configuring a VPS on DigitalOcean.
Step 1: Create a DigitalOcean Account
- Go to DigitalOcean and sign up.
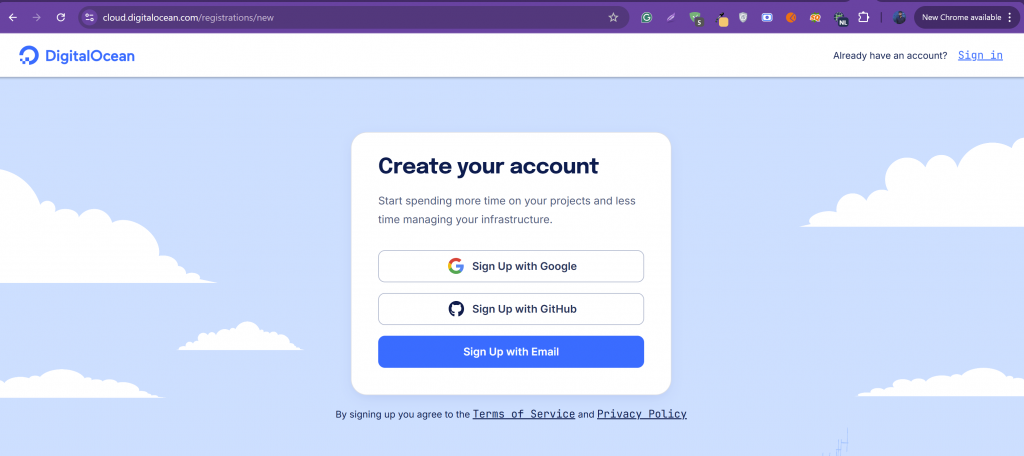
- Confirm your email address and enter your billing details.
Step 2: Create a Droplet (VPS Instance)
- Log in to your DigitalOcean account.
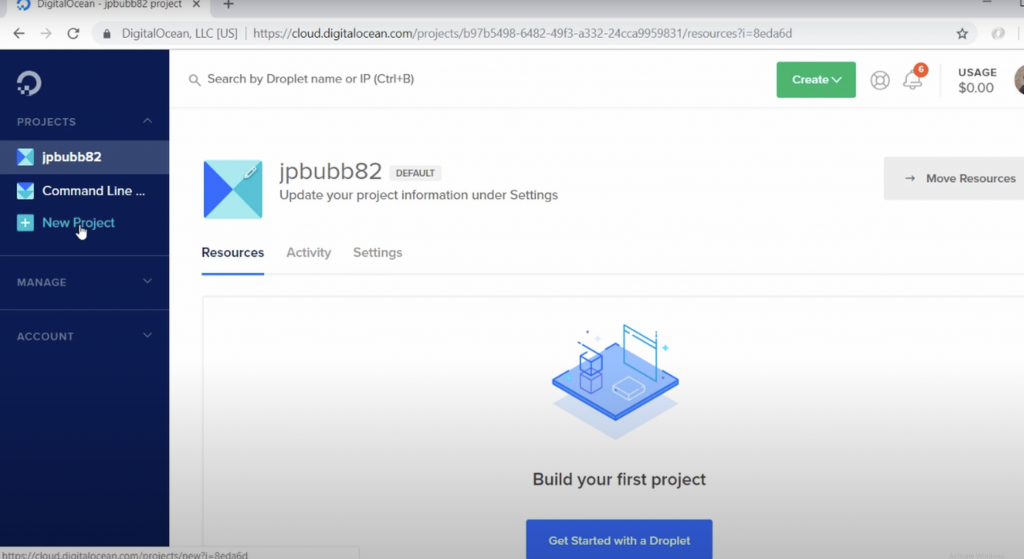
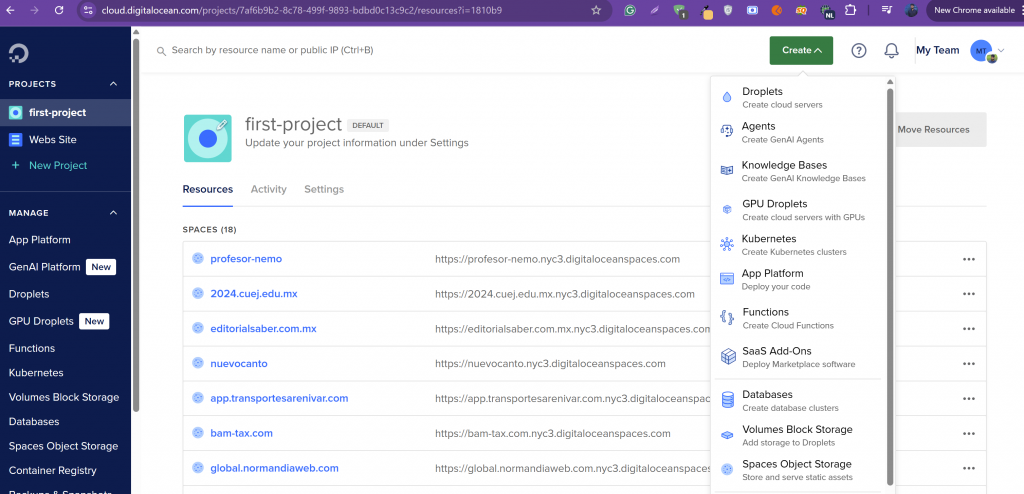
2. Select the project in which you want to deploy VPS.
- Click on Create → Droplets in the top-right corner.
3. Choose Region:
You can choose any region that you want and also that suits you.
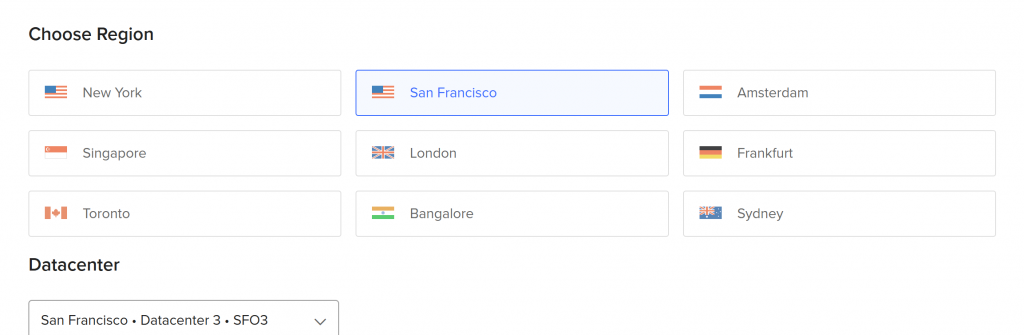
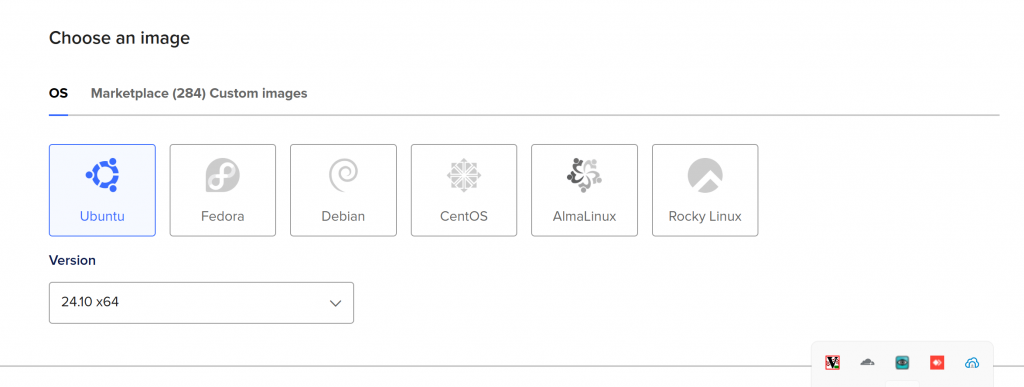
- Choose an image (OS): Ubuntu, AlmaLinux, CentOS, Debian, etc.
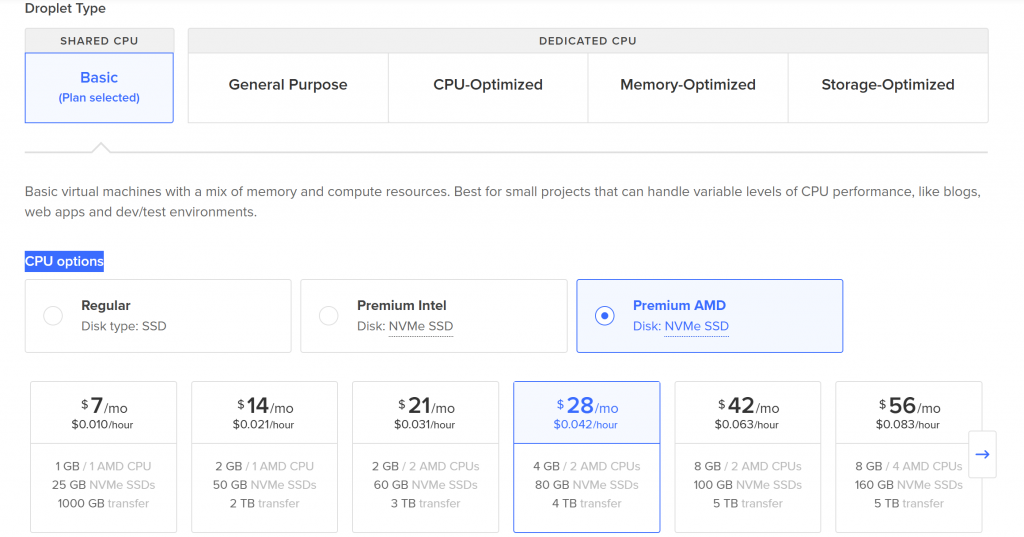
Choose Size:
In this section you can choose few things, Droplet Type, CPU options.
Droplet Type
- Shared CPU
- Basic (Plan Selected)
- Dedicated CPU Options (Not Selected)
- General Purpose
- CPU-Optimized
- Memory-Optimized
- Storage-Optimized
CPU Options
- Regular (Disk type: SSD)
- Premium Intel (Disk: NVMe SSD)
- Premium AMD (Disk: NVMe SSD) (Selected)
Pricing and Specifications
| Price | Hourly Rate | RAM | CPU | Storage | Bandwidth |
|---|---|---|---|---|---|
| $7/mo | $0.010/hour | 1 GB | 1 AMD CPU | 25 GB NVMe SSDs | 1000 GB transfer |
| $14/mo | $0.021/hour | 2 GB | 1 AMD CPU | 50 GB NVMe SSDs | 2 TB transfer |
| $21/mo | $0.031/hour | 2 GB | 2 AMD CPUs | 60 GB NVMe SSDs | 3 TB transfer |
| $28/mo | $0.042/hour | 4 GB | 2 AMD CPUs | 80 GB NVMe SSDs | 4 TB transfer |
| $42/mo | $0.063/hour | 8 GB | 2 AMD CPUs | 100 GB NVMe SSDs | 5 TB transfer |
| $56/mo | $0.083/hour | 8 GB | 4 AMD CPUs | 160 GB NVMe SSDs | 5 TB transfer |
Would you like help in choosing the best plan for your needs?
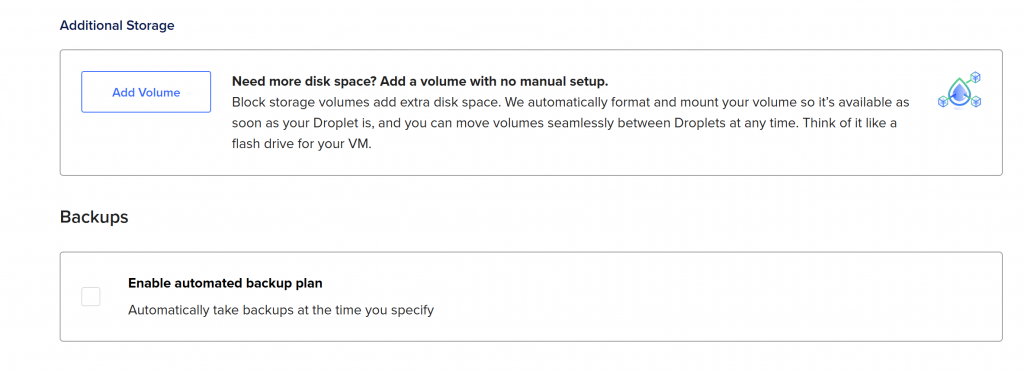
Additional Storage
- Option to Add Volume
- Provides extra disk space using block storage volumes.
- Automatic formatting and mounting for immediate availability.
- Volumes can be moved seamlessly between Droplets.
- Functions like a flash drive for the virtual machine (VM).
Backups
- Option to Enable Automated Backup Plan
- Automatically takes backups at a specified time.
- The checkbox for enabling backups is currently unchecked.
Would you like recommendations on whether to enable backups or add storage?
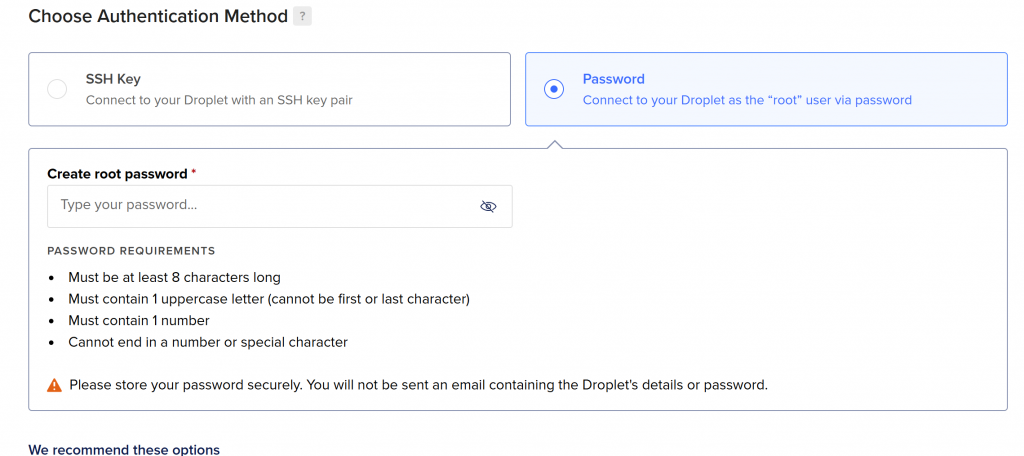
Choose Authentication Method
- SSH Key (Not selected)
- Connect to the Droplet with an SSH key pair.
- Password (Selected)
- Connect to the Droplet as the “root” user via password.
Root Password Requirements
- Must be at least 8 characters long.
- Must contain 1 uppercase letter (cannot be the first or last character).
- Must contain 1 number.
- Cannot end in a number or special character.
⚠ Important Notice:
- Store your password securely.
- You will not receive an email containing the Droplet’s details or password.
Would you like recommendations on securing your Droplet or choosing the best authentication method?
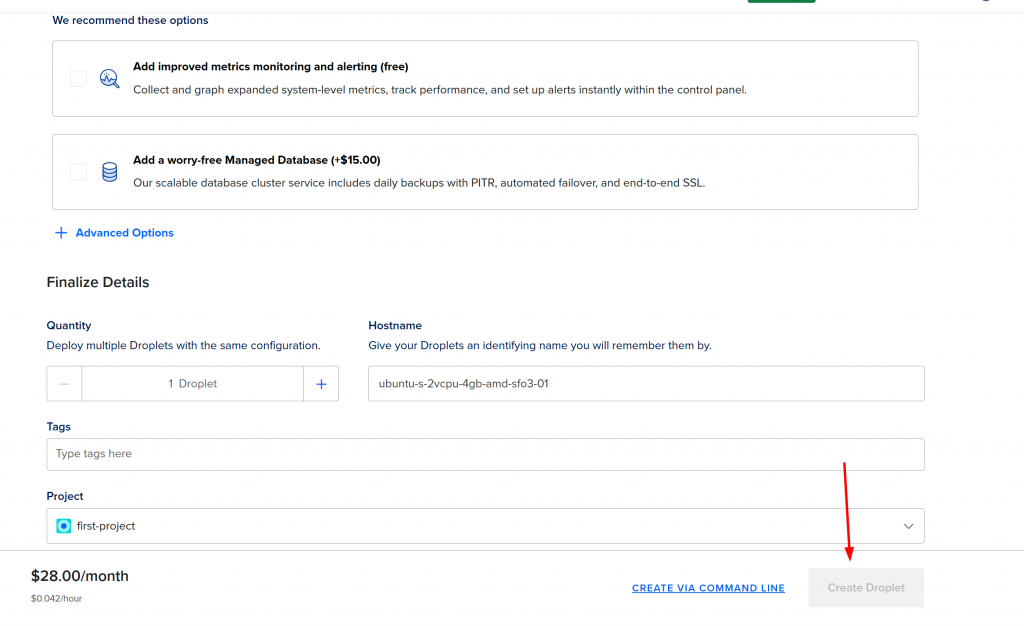
Here are the details from this final Droplet setup screen:
Recommended Options (Optional Add-ons)
- Improved Metrics Monitoring and Alerting (Free)
- Collect and graph system-level metrics
- Track performance and set alerts instantly
- Worry-Free Managed Database (+$15.00)
- Scalable database service
- Includes:
- Daily backups with PITR
- Automated failover
- End-to-end SSL
Finalize Details
- Quantity:
- 1 Droplet (default, can increase if deploying multiple instances)
- Hostname:
ubuntu-s-2vcpu-4gb-amd-sfo3-01- This is an auto-generated name that you can change to something more meaningful
- Tags:
- Empty field for adding tags (optional)
- Project:
first-project(selected project for organizational purposes)
Create Droplet Button
- The “Create Droplet” button is disabled (grayed out), likely because the root password hasn’t been set yet (as seen in your previous screenshot).
✅ Once the password is set (and meets all the criteria), the “Create Droplet” button will be enabled.
Would you like help picking a hostname or deciding on monitoring/database options?
Step 3: Connect to Your VPS
Once your droplet is created, you’ll see an assigned IP address.
- Using SSH (For Linux/macOS):
Open the terminal and enter:ssh root@your_droplet_ipIf using an SSH key, no password is needed. Otherwise, enter the root password. - Using PuTTY (For Windows):
- Download and open PuTTY.
- Enter your Droplet’s IP address.
- Click Open and log in as
root.
📷 Image Suggestion: Screenshot of a terminal connected to the VPS.
Step 4: Update and Secure Your VPS
After logging in, update the system:
apt update && apt upgrade -y  # For Ubuntu/Debian
dnf update -y  # For AlmaLinux/CentOS
Set Up a New User (Optional but Recommended)
adduser yourusername
usermod -aG sudo yourusername  # For Ubuntu/Debian
usermod -aG wheel yourusername  # For AlmaLinux/CentOS
Set Up a Firewall (Recommended for Security)
ufw allow OpenSSH
ufw enable
📷 Image Suggestion: Screenshot of a successful SSH login and system update in progress.
Step 5: Install a Web Server (Optional)
If you’re hosting a website, install a web server like Apache or Nginx.
Install Apache
apt install apache2 -y  # Ubuntu/Debian
dnf install httpd -y  # AlmaLinux/CentOS
systemctl enable --now apache2  # Ubuntu/Debian
systemctl enable --now httpd  # AlmaLinux/CentOS
Install Nginx
apt install nginx -y  # Ubuntu/Debian
dnf install nginx -y  # AlmaLinux/CentOS
systemctl enable --now nginx
📷 Image Suggestion: Screenshot of the Apache or Nginx welcome page when accessed via the VPS IP address.
Conclusion
Your DigitalOcean VPS is now set up and ready to use! From here, you can configure databases, deploy applications, or set up a control panel like cPanel.
Would you like a downloadable version of this guide with images? Let me know! 🚀